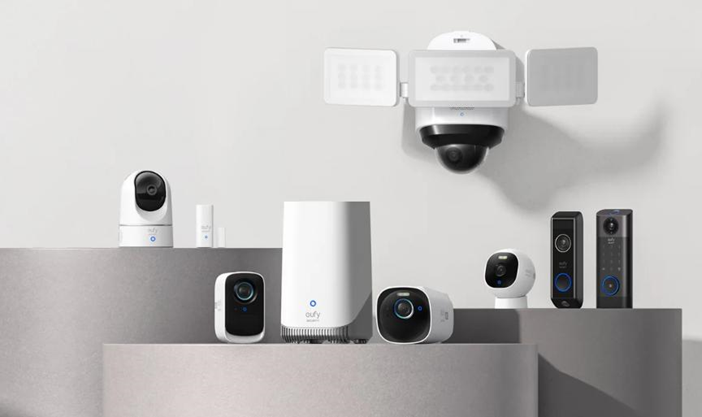
PTZ (Pan-Tilt-Zoom) cameras are a versatile addition to any security system, offering 360-degree coverage and the ability to zoom in on details—making them ideal for monitoring large areas like parking lots, warehouses, or sprawling yards. Unlike fixed cameras, PTZs can be remotely controlled to pan (swivel horizontally), tilt (angle vertically), and zoom, ensuring no blind spots go unchecked. However, their effectiveness depends largely on proper installation: a poorly placed or misconfigured PTZ camera may miss critical areas or fail to deliver clear footage. This article provides a comprehensive guide to installing a PTZ camera for optimal coverage, covering everything from site selection and mounting to wiring, setup, and testing. Whether you’re a homeowner or a business owner, these steps will help you maximize the camera’s capabilities and ensure reliable surveillance.
Pre-Installation Planning and Site Selection
Assess the Area and Identify Coverage Needs
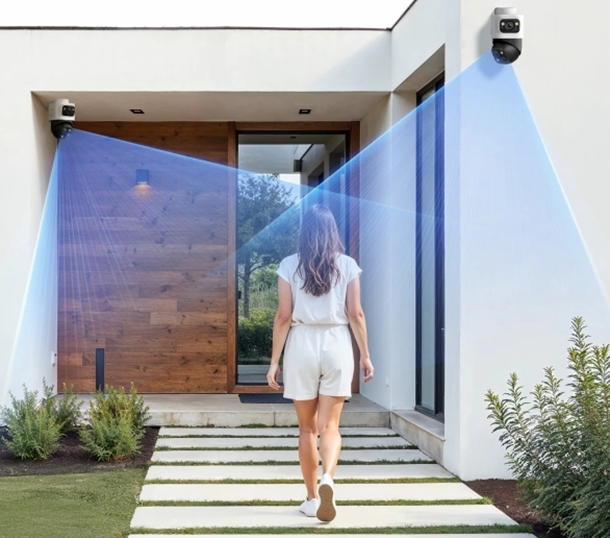
Before mounting a PTZ camera, assess the area and identify key zones like entry points, walkways, or valuable assets. PTZ cameras are ideal for large spaces, often replacing multiple fixed cameras. Most offer 360° pan, -90° to +90° tilt, and up to 30x optical zoom. Estimate coverage needs—for instance, a warehouse may require 20x zoom to capture details 100 feet away. Mount the camera 10–15 feet high to minimize obstructions and tampering. Ensure reliable power (PoE, adapter, or battery) and network access, and for outdoor use, choose models with an IP66 or higher weather resistance rating.
Choose the Right Mounting Location
The mounting location greatly affects camera coverage. For outdoor areas like parking lots, place the camera on a sturdy pole or wall high enough to avoid blind spots yet out of reach from vandals. Poles work best for 360° coverage, while walls suit focused views such as driveways. Indoors, ceiling mounts provide clear downward angles for large spaces like warehouses or retail floors. Avoid heat sources, vents, or bright lights that cause glare or overheating. For night vision PTZs, limit strong artificial lighting. Test visibility with a temporary setup, then mark the ideal spot before mounting.
Mounting and Wiring the PTZ Camera
Secure the Camera Mount and Attach the Device
Once the location is chosen, install the mounting bracket. Most PTZ cameras include a universal mount suitable for poles, walls, or ceilings. Use weatherproof hardware outdoors and ensure the bracket is level and secure to avoid shaking that can blur footage. For poles, fasten with clamps or U-bolts; for walls or ceilings, drill pilot holes, insert anchors, and screw the bracket in place. Test stability with a gentle tug before attaching the camera. Secure the PTZ unit using the provided screws or quick-release mechanism, then check that it pans and tilts freely. For outdoor setups, seal the mount base to block water.
Connect Power and Network Cables
PTZ cameras need both power and network connectivity. The easiest option is Power over Ethernet (PoE), which uses a single Cat5e or Cat6 cable to deliver power and data. If PoE isn’t available, use an AC adapter with a separate Ethernet cable, and protect outdoor connections with a weatherproof box. For wireless models, ensure the camera is within Wi-Fi range or add an extender if needed. Route cables securely—use conduit outdoors to guard against weather and pests, and conceal indoor wiring in walls or ceilings. Finally, test connections; most PTZs show a power or network light when active.
Configuring the PTZ Camera for Optimal Performance
Set Up Presets and Tour Modes
Presets are pre-programmed positions that let the camera quickly move to key locations (e.g., a gate or loading dock) with a single command. To set presets, access the camera’s interface via a web browser or mobile app, pan/tilt/zoom to the desired view, and save the position (label it for easy recall, e.g., “Main Entrance”). Repeat for 4–6 critical zones to cover the area thoroughly.
Tour modes automate the camera’s movement, cycling through presets at set intervals (e.g., 30 seconds per preset). This ensures continuous coverage of all key areas without manual control. Adjust the tour speed to avoid blurring—slower transitions work better for detailed monitoring.
Calibrate Motion Detection and Alerts
PTZ cameras can trigger alerts when motion is detected in specific zones. Access the camera’s settings to define motion areas (e.g., a parking spot or walkway) and adjust sensitivity to avoid false alerts from wind-blown debris or animals. Enable “auto-tracking” if available—this feature lets the camera follow moving objects (e.g., a person or vehicle) within its range, ensuring continuous coverage of the target. Configure alert notifications to send push messages, emails, or snapshots to your phone when motion is detected. Test alerts by walking through the monitored area to ensure they trigger reliably. Adjust settings as needed to balance sensitivity and accuracy.
Testing and Fine-Tuning Coverage
After completing the setup, it’s important to thoroughly test the camera’s pan, tilt, and zoom functions to confirm that all critical areas are fully covered. Pay close attention to the image quality at maximum zoom—footage should remain sharp enough to clearly identify details such as facial features or license plate numbers. Next, evaluate the night vision capability by observing the area after dark, ensuring the infrared LEDs provide proper illumination without causing glare or distortion. If you notice any blind spots, dark patches, or blurred images, adjust the camera’s angle, focus, or mounting height until performance is optimized.
Conclusion
Installing a PTZ camera for optimal coverage requires careful planning, precise mounting, and thoughtful configuration. By selecting the right location, securing the camera properly, and setting up presets and alerts, you can maximize its range and flexibility. Regular testing and adjustments will ensure the camera continues to monitor key areas effectively, providing reliable security for your home or business. With these steps, your PTZ camera will become a powerful tool for comprehensive surveillance.